I'm almost done setting up my scrap studio...I am so excited to use it! I'm still looking for some boxes of ribbon and a few other things, but I have my paper trimmer, paper, adhesive, Cuttlebug, and Cricut. And my stamps and stamp pads, of course :) This move has been interesting. I was out of town for my family's last move, but apparently this one was worse. Mainly since my dad was so sick the whole day. But he's doing much better now, thankfully.
Still waiting to get my Jeep fixed up...the starter has been replaced but the fuel line and transfer case need servicing. We're much closer to our mechanic now so hopefully we'll get to that soon.
Not much else to say, I'm just checking in. Hoping to find a new layout soon!
I'll post pics of my studio once it's complete!

Sunday, December 6, 2009
Moving, Day 4
I'm almost done setting up my scrap studio...I am so excited to use it! I'm still looking for some boxes of ribbon and a few other things, but I have my paper trimmer, paper, adhesive, Cuttlebug, and Cricut. And my stamps and stamp pads, of course :) This move has been interesting. I was out of town for my family's last move, but apparently this one was worse. Mainly since my dad was so sick the whole day. But he's doing much better now, thankfully.
Still waiting to get my Jeep fixed up...the starter has been replaced but the fuel line and transfer case need servicing. We're much closer to our mechanic now so hopefully we'll get to that soon.
Not much else to say, I'm just checking in. Hoping to find a new layout soon!
I'll post pics of my studio once it's complete!
Wednesday, December 2, 2009
Your Style
I have created a unique style for myself. I like to call it "glamor grunge." Alliteration and contrast, love it! Basically it's distressing a project but using sparkly elements, girly stuff, elegant swirls, etc. Here are a few examples of this style:

"Create" Altered Puzzle Piece
Products used: card stock, wood mounted diamond stamp, red ink,
white yarn, Tim Holtz grungeboard Elements Plain, Christmas Red Stickles,
Tim Holtz Picket Fence Crackle Paint, Tim Holtz black Distress Stickles,
Tiny Type alphabet, two rhinestones
 "Visualizing Music"
I created this for a mini album featuring my art. I distressed this by using a
"grungy" image, tearing black paper to mat the photo, using black ink
to smudge the edges of the page, and used Walnut ink to grunge up
the flowers. Adding in the rhinestones and color helps "glamor" it up a bit.
 "Maeven Electric"
Also for my mini album. The background and paper are what mostly
make this "grunge," as well as the hastily drawn faux stitching. I also
distressed the pink flower a bit.
I encourage everyone to try and create a unique style of their own. It doesn't mean each thing you create will look the same, it just means it will have your "signature" look to it. And that's a good thing.
Wow I sound like Martha Stewart..."it's a good thing." Off to do some insider stock trading! (Ok that really wasn't funny, but I try).
Wow I sound like Martha Stewart..."it's a good thing." Off to do some insider stock trading! (Ok that really wasn't funny, but I try).
Your Style
I have created a unique style for myself. I like to call it "glamor grunge." Alliteration and contrast, love it! Basically it's distressing a project but using sparkly elements, girly stuff, elegant swirls, etc. Here are a few examples of this style:
"Create" Altered Puzzle Piece
Products used: card stock, wood mounted diamond stamp, red ink,
white yarn, Tim Holtz grungeboard Elements Plain, Christmas Red Stickles,
Tim Holtz Picket Fence Crackle Paint, Tim Holtz black Distress Stickles,
Tiny Type alphabet, two rhinestones
"Visualizing Music"
I created this for a mini album featuring my art. I distressed this by using a
"grungy" image, tearing black paper to mat the photo, using black ink
to smudge the edges of the page, and used Walnut ink to grunge up
the flowers. Adding in the rhinestones and color helps "glamor" it up a bit.
"Maeven Electric"
Also for my mini album. The background and paper are what mostly
make this "grunge," as well as the hastily drawn faux stitching. I also
distressed the pink flower a bit.
"Create" Altered Puzzle Piece
Products used: card stock, wood mounted diamond stamp, red ink,
white yarn, Tim Holtz grungeboard Elements Plain, Christmas Red Stickles,
Tim Holtz Picket Fence Crackle Paint, Tim Holtz black Distress Stickles,
Tiny Type alphabet, two rhinestones
"Visualizing Music"I created this for a mini album featuring my art. I distressed this by using a
"grungy" image, tearing black paper to mat the photo, using black ink
to smudge the edges of the page, and used Walnut ink to grunge up
the flowers. Adding in the rhinestones and color helps "glamor" it up a bit.
"Maeven Electric"Also for my mini album. The background and paper are what mostly
make this "grunge," as well as the hastily drawn faux stitching. I also
distressed the pink flower a bit.
I encourage everyone to try and create a unique style of their own. It doesn't mean each thing you create will look the same, it just means it will have your "signature" look to it. And that's a good thing.
Wow I sound like Martha Stewart..."it's a good thing." Off to do some insider stock trading! (Ok that really wasn't funny, but I try).
Wow I sound like Martha Stewart..."it's a good thing." Off to do some insider stock trading! (Ok that really wasn't funny, but I try).
Friday, November 27, 2009
Blogger Challenge
I just joined a challenge on Scrapbook.com, and here is my first entry for it!
Wow, there's still five more questions to answer. I'll be taking care of those later :)
I decided to use some of the suggested topics, so I'll just go in order.
1.) Is there someone you wish you could talk to one more time?
My grandpa died when I was 8, so I didn't get to know him very well. I dream of him every once in awhile and in my dream I always tell him how our family is doing, and what kinds of things I'm into. My most recent dream about him involved me showing him all my scrapbook stuff. I really feel that is God's way of allowing me to connect with my grandpa again. He never got to see me and my siblings grow up, so I would love to just talk to him again and get to know him better.
2.) If you could live in a different time period, past or future when would it be and why?
I would choose the time when my ancestors came to America. It would be so cool to meet my family from way back in the day. I would say future just because it might be easier to fit in, but I'm not sure if there will be a future. God may end the world tomorrow, so I'd choose to go back to the 1700s, 1800s just to get to know my ancestors. Family is important to me, so that would be really cool!
3.) List your 10 worst pet peeves.
- Hearing people chew.
- Loud, sudden noises.
- When people don't realize the right turn lane arrow is green and they stop and look left anyway.
- Having to repeat myself.
- When people talk on their cell phone in a store or restaurant.
- Poor grammar and spelling (i.e., when people don't use periods in their sentences it's so annoying do you know what i mean) So ANNOYING!
- Whenever someone wears WAY too much cologne.
- Slow drivers.
- People who end sentences in propositions.
- Being stuck behind a slow walking person in a store (when the aisles are too small to pass).
4.) What is your earliest memory and why has it stayed with you?
My first memory is of my grandpa. I was 2 years old and he walked in to my room because I had just woken up, and I was standing in my crib smiling at him. The blinds were closed and the room was yellow--ish from the sun outside. He smiled at me and that's where my memory ends.
5.) What is your most valued possession. Why?
My computer...and that's because I rely on it several times a day. When the hard drive crashed, I cried. When I found out how long it would take to fix it at Best Buy, I cried. Luckily I found a better shop in Indy that fixed it in a much quicker fashion. I hate being without my computer. I spend so much time on it, and I love it.
Tuesday, October 13, 2009
Fun with K & Company Que Sera Sera
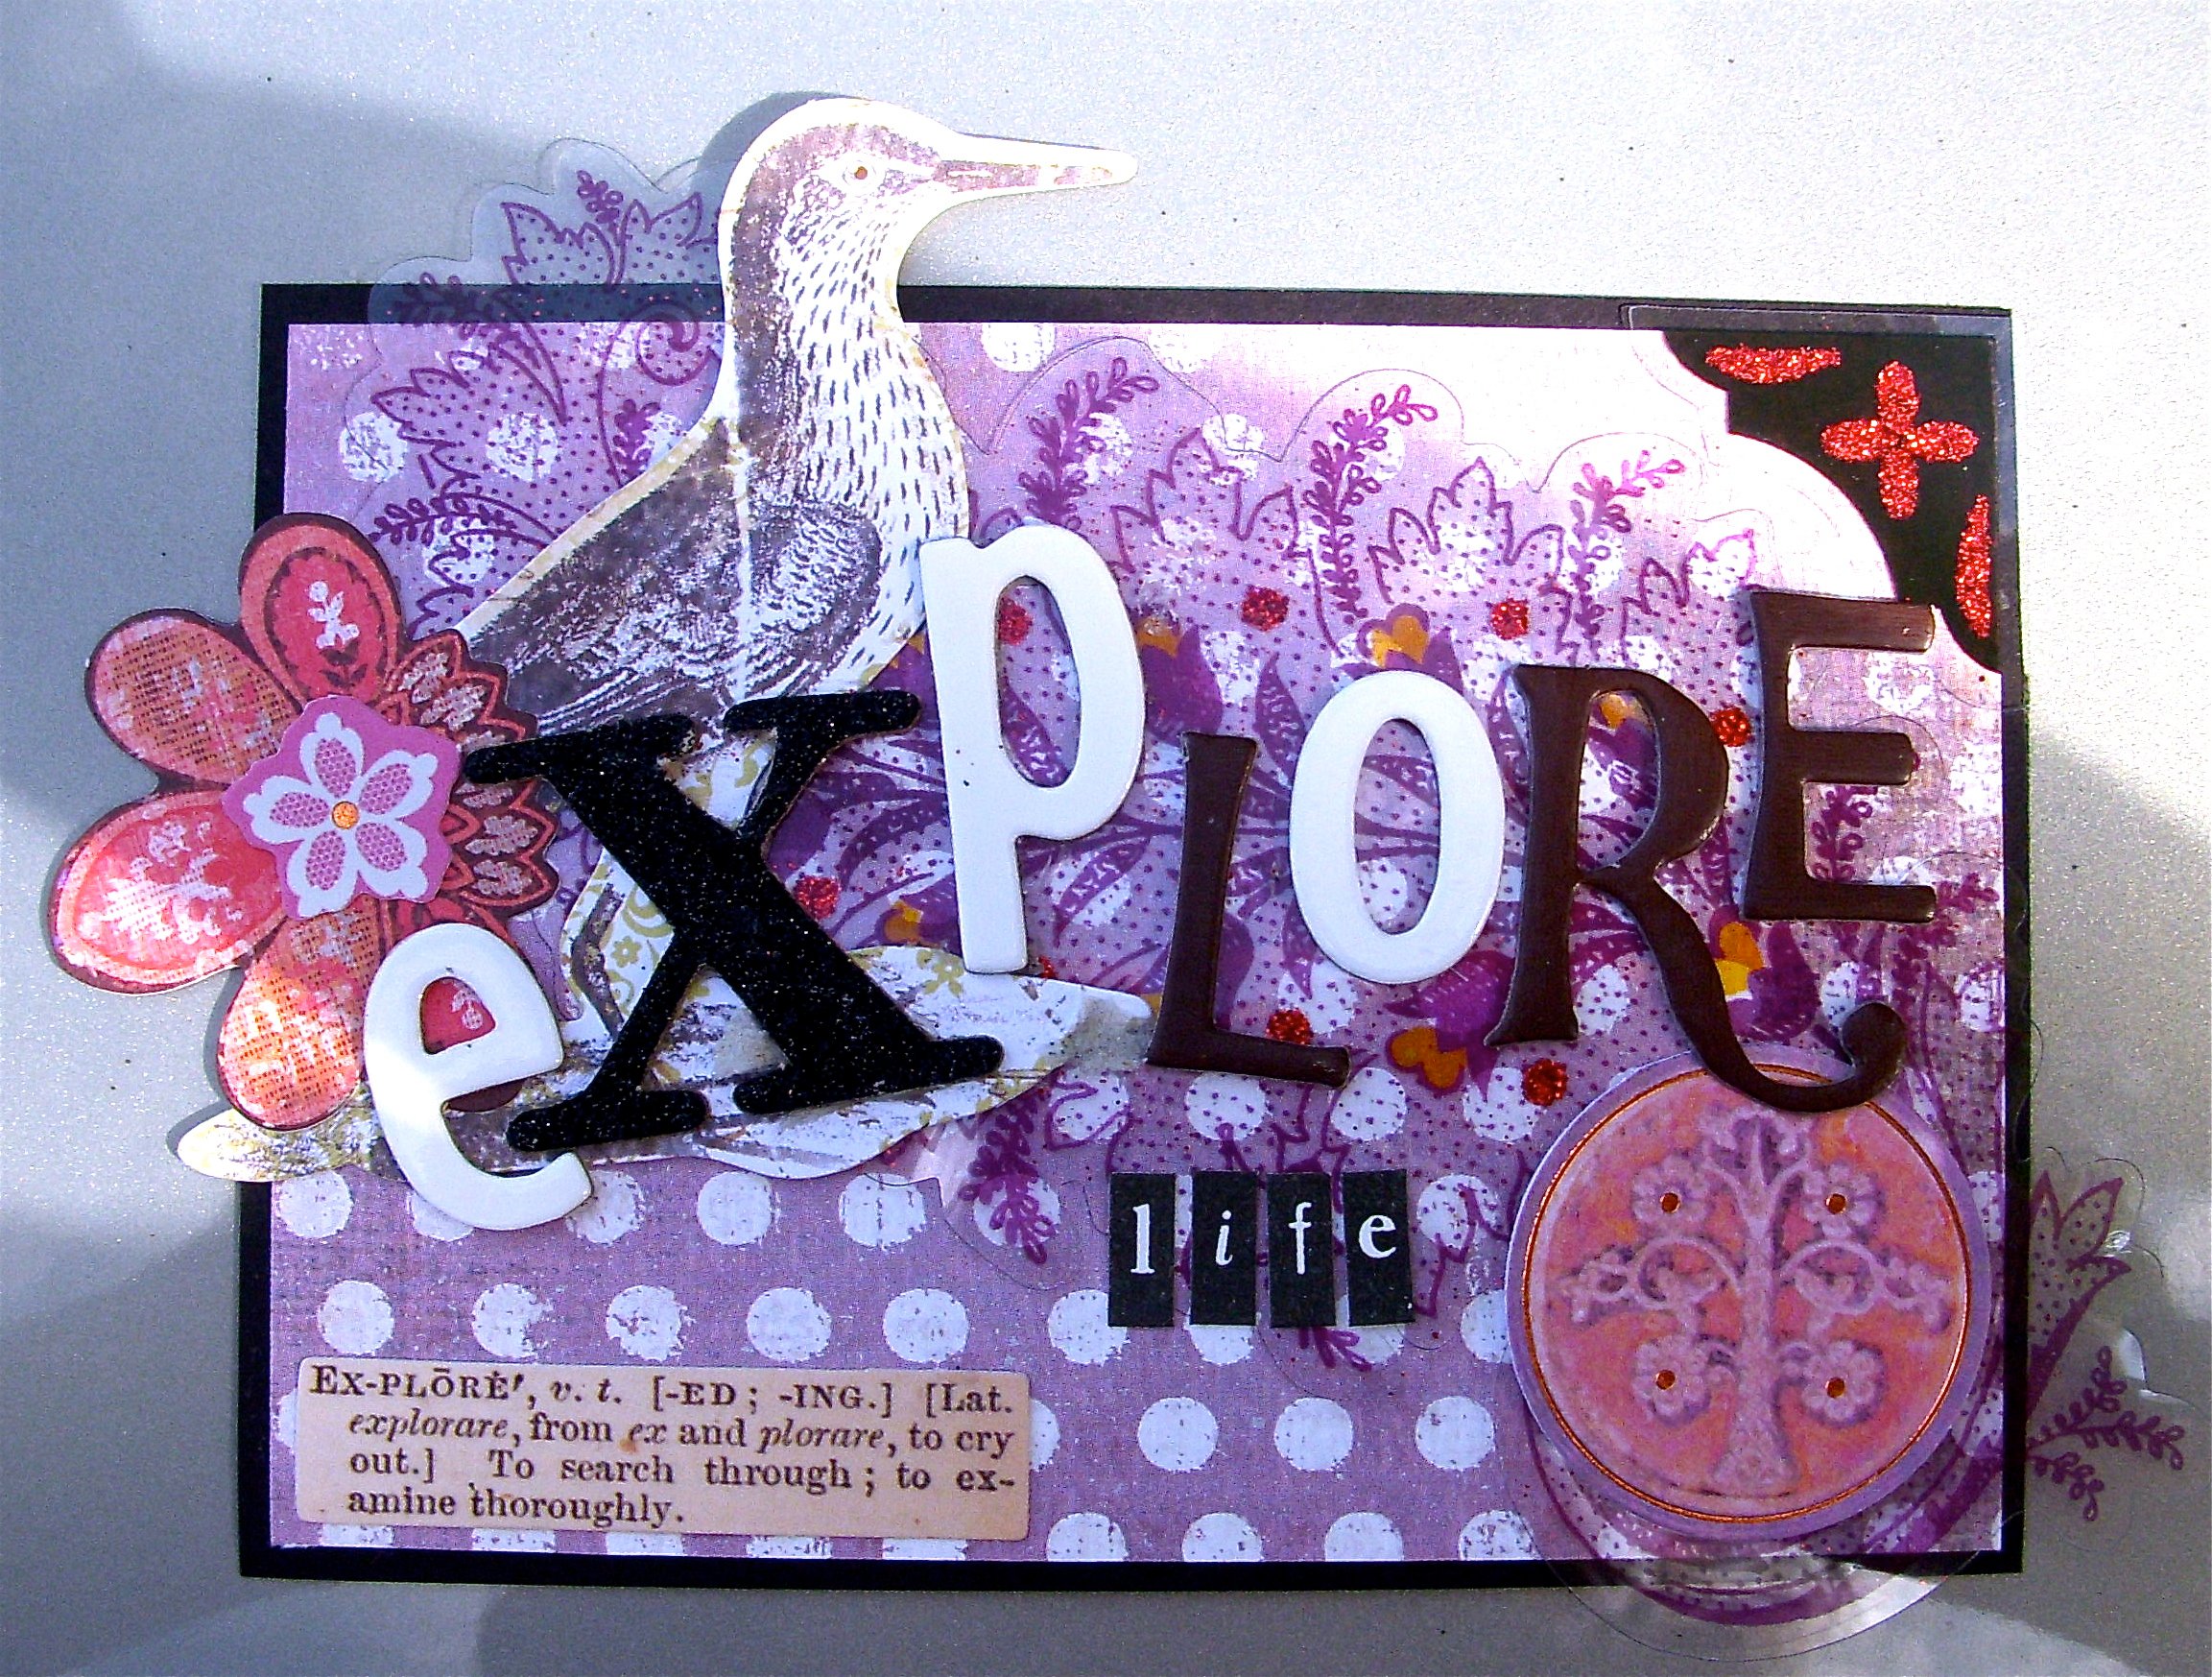
I was browsing eBay, and I found a wonderful embellishment set by K & Company. The line is called Que Sera Sera (which is from The Sound of Music as my dad informed me), but it has an old-world, fantasy, Latin feel to it. It is so much fun to work with, and I hope to have the entire collection from the Que Sera Sera line soon. I made several ATCs (Artist Trading Cards) for scrapbook.com's Anything Goes ATC Swap #2, and they were so much fun to make. With such a fantastic line from K & Company to work with, they were anything but complicated even though they look like they took hours. Each one took less than one hour. Here's what I created:
 "Que Sera Sera!"
 "Imagine"
 "Brighten"
I realized that all it takes to really take a card from ordinary to extraordinary can be going outside the lines -- literally. The rectangular shape becomes unique and organic by letting cutouts flow over the edges.
Next up I show you the steps I took in creating a new original Christmas card. Stay tuned :)
"Que Sera Sera!""Explore Life"
"Imagine""Brighten"I realized that all it takes to really take a card from ordinary to extraordinary can be going outside the lines -- literally. The rectangular shape becomes unique and organic by letting cutouts flow over the edges.
Next up I show you the steps I took in creating a new original Christmas card. Stay tuned :)
Fun with K & Company Que Sera Sera
I was browsing eBay, and I found a wonderful embellishment set by K & Company. The line is called Que Sera Sera (which is from The Sound of Music as my dad informed me), but it has an old-world, fantasy, Latin feel to it. It is so much fun to work with, and I hope to have the entire collection from the Que Sera Sera line soon. I made several ATCs (Artist Trading Cards) for scrapbook.com's Anything Goes ATC Swap #2, and they were so much fun to make. With such a fantastic line from K & Company to work with, they were anything but complicated even though they look like they took hours. Each one took less than one hour. Here's what I created:
"Que Sera Sera!"
"Imagine"
"Brighten"
I realized that all it takes to really take a card from ordinary to extraordinary can be going outside the lines -- literally. The rectangular shape becomes unique and organic by letting cutouts flow over the edges.
Next up I show you the steps I took in creating a new original Christmas card. Stay tuned :)
"Que Sera Sera!""Explore Life"
"Imagine""Brighten"I realized that all it takes to really take a card from ordinary to extraordinary can be going outside the lines -- literally. The rectangular shape becomes unique and organic by letting cutouts flow over the edges.
Next up I show you the steps I took in creating a new original Christmas card. Stay tuned :)
Sunday, September 27, 2009
Thank you, Shayla!
I'm really loving the Scrapbook.com community. I posted a thread in the general forum expressing my need for empty ribbon spools to house the 25 un-spooled rolls of ribbon I have coming, and one member, ShalyaCreations, generously offered to send me 25 empty spools. That entailed taking all the leftover ribbon off the spools and storing it elsewhere, taking a photo of the spools I'd receive, and having it sent to me in the mail.
How's that for scrapbooker camaraderie?
Check out her gallery at Scrapbook.com: [shaylacreations]
She also has a blog here at Shaylacreations.blogspot.com

How's that for scrapbooker camaraderie?
Check out her gallery at Scrapbook.com: [shaylacreations]
She also has a blog here at Shaylacreations.blogspot.com

Thank you, Shayla!
I'm really loving the Scrapbook.com community. I posted a thread in the general forum expressing my need for empty ribbon spools to house the 25 un-spooled rolls of ribbon I have coming, and one member, ShalyaCreations, generously offered to send me 25 empty spools. That entailed taking all the leftover ribbon off the spools and storing it elsewhere, taking a photo of the spools I'd receive, and having it sent to me in the mail.
How's that for scrapbooker camaraderie?
Check out her gallery at Scrapbook.com: [shaylacreations]
She also has a blog here at Shaylacreations.blogspot.com
How's that for scrapbooker camaraderie?
Check out her gallery at Scrapbook.com: [shaylacreations]
She also has a blog here at Shaylacreations.blogspot.com
Friday, September 25, 2009
Ribbons & Sugar
My friends, this little ribbon rack from Marie Osmond crafts is apparently quite popular. The three top search result stores were out of stock, but I did find it on eBay for $7. Could have gotten it cheaper (and cheaper shipping), but I've got 25 spools of ribbon coming to me and I need a way to store them! Here's the coveted rack:

The title of this post is in reference to Gatsby's American Dream's second album, Ribbons & Sugar. I love that band. The lead singer, Nic Newsham, is even my friend on Facebook :)

The title of this post is in reference to Gatsby's American Dream's second album, Ribbons & Sugar. I love that band. The lead singer, Nic Newsham, is even my friend on Facebook :)
Ribbons & Sugar
My friends, this little ribbon rack from Marie Osmond crafts is apparently quite popular. The three top search result stores were out of stock, but I did find it on eBay for $7. Could have gotten it cheaper (and cheaper shipping), but I've got 25 spools of ribbon coming to me and I need a way to store them! Here's the coveted rack:
The title of this post is in reference to Gatsby's American Dream's second album, Ribbons & Sugar. I love that band. The lead singer, Nic Newsham, is even my friend on Facebook :)
The title of this post is in reference to Gatsby's American Dream's second album, Ribbons & Sugar. I love that band. The lead singer, Nic Newsham, is even my friend on Facebook :)
Thursday, September 24, 2009
A Scrapbooking Story
I started scrapbooking in January. My motivation was to make a scrapbook of my sister's wedding and give it to her as a gift. I slowly got about four pages done, then started a new job and stopped scrapping. Well, when I left that job I started up again, and this time around it has gotten to be a full-blown addiction! I adore it. That's why it's one topic of my blog :)
For my sister's wedding scrapbook, I ended up spending a few hundred dollars on supplies. I worked on it for a grand total of 200 hours. It took 8 months, and weighed over 6 pounds. It had a total of 44 pages. It was massive. Here's a video I made of the pages...basically a slideshow.
I have been working on several other scrapbooks along with my sister's. I finally gave my sister her scrapbook, and she loved it (thank God!). I just finished an album for my best friend's birthday and a mini-album featuring my photography and photo manipulations. I'm currently working on my personal scrapbook (no real theme, just life in general) and on an album for my mom's birthday at the end of November.
I've found that I enjoy working on albums that I'm making for someone else a lot more than I like making them for myself. It's heartbreaking giving all that work away, but I will always have fond memories :) And that's exactly why I take photos of all my work!
My favorite place to get layout ideas is from ScrapbooksEtc.com. You have to create an account to download the PDF files, but they have hundreds of layouts. Many of them come with a real-life example, which is very helpful in seeing how it will come together. They offer quite a bit of inspiration, too.
____________________________
From my album, "Happiness"
Lauren & Me

From my album, "Happiness"
Lauren & Me

This is one of my best friends, Lauren. We were at an All-Time Low show near Chicago and Lauren snapped this shot of us hanging around.
To make this page, I used a template I found on Scrapbook.com. I opened the photo in Photoshop and printed the 12x12 page on four sheets of 8.5x11" computer paper. Then I cut the pages down and taped them together to get my full-size template. I colored with a pencil over the back of the template, and then turned the pages over and traced over the design so it would transfer the graphite onto my scrapbook page. To finish the design, I darkened it with a black ink pen and sharpie.
The butterfly was printed on transparency paper and rubbed on. The title is also a transparency rub-on. The chorus to Mika's "Grace Kelly" is -- you guessed it -- a transparency rub-on as well :)
A Scrapbooking Story
I started scrapbooking in January. My motivation was to make a scrapbook of my sister's wedding and give it to her as a gift. I slowly got about four pages done, then started a new job and stopped scrapping. Well, when I left that job I started up again, and this time around it has gotten to be a full-blown addiction! I adore it. That's why it's one topic of my blog :)
For my sister's wedding scrapbook, I ended up spending a few hundred dollars on supplies. I worked on it for a grand total of 200 hours. It took 8 months, and weighed over 6 pounds. It had a total of 44 pages. It was massive. Here's a video I made of the pages...basically a slideshow.
I have been working on several other scrapbooks along with my sister's. I finally gave my sister her scrapbook, and she loved it (thank God!). I just finished an album for my best friend's birthday and a mini-album featuring my photography and photo manipulations. I'm currently working on my personal scrapbook (no real theme, just life in general) and on an album for my mom's birthday at the end of November.
I've found that I enjoy working on albums that I'm making for someone else a lot more than I like making them for myself. It's heartbreaking giving all that work away, but I will always have fond memories :) And that's exactly why I take photos of all my work!
My favorite place to get layout ideas is from ScrapbooksEtc.com. You have to create an account to download the PDF files, but they have hundreds of layouts. Many of them come with a real-life example, which is very helpful in seeing how it will come together. They offer quite a bit of inspiration, too.
For my sister's wedding scrapbook, I ended up spending a few hundred dollars on supplies. I worked on it for a grand total of 200 hours. It took 8 months, and weighed over 6 pounds. It had a total of 44 pages. It was massive. Here's a video I made of the pages...basically a slideshow.
I have been working on several other scrapbooks along with my sister's. I finally gave my sister her scrapbook, and she loved it (thank God!). I just finished an album for my best friend's birthday and a mini-album featuring my photography and photo manipulations. I'm currently working on my personal scrapbook (no real theme, just life in general) and on an album for my mom's birthday at the end of November.
I've found that I enjoy working on albums that I'm making for someone else a lot more than I like making them for myself. It's heartbreaking giving all that work away, but I will always have fond memories :) And that's exactly why I take photos of all my work!
My favorite place to get layout ideas is from ScrapbooksEtc.com. You have to create an account to download the PDF files, but they have hundreds of layouts. Many of them come with a real-life example, which is very helpful in seeing how it will come together. They offer quite a bit of inspiration, too.
____________________________
From my album, "Happiness"
Lauren & Me
From my album, "Happiness"
Lauren & Me
This is one of my best friends, Lauren. We were at an All-Time Low show near Chicago and Lauren snapped this shot of us hanging around.
To make this page, I used a template I found on Scrapbook.com. I opened the photo in Photoshop and printed the 12x12 page on four sheets of 8.5x11" computer paper. Then I cut the pages down and taped them together to get my full-size template. I colored with a pencil over the back of the template, and then turned the pages over and traced over the design so it would transfer the graphite onto my scrapbook page. To finish the design, I darkened it with a black ink pen and sharpie.
The butterfly was printed on transparency paper and rubbed on. The title is also a transparency rub-on. The chorus to Mika's "Grace Kelly" is -- you guessed it -- a transparency rub-on as well :)
To make this page, I used a template I found on Scrapbook.com. I opened the photo in Photoshop and printed the 12x12 page on four sheets of 8.5x11" computer paper. Then I cut the pages down and taped them together to get my full-size template. I colored with a pencil over the back of the template, and then turned the pages over and traced over the design so it would transfer the graphite onto my scrapbook page. To finish the design, I darkened it with a black ink pen and sharpie.
The butterfly was printed on transparency paper and rubbed on. The title is also a transparency rub-on. The chorus to Mika's "Grace Kelly" is -- you guessed it -- a transparency rub-on as well :)
Wednesday, September 23, 2009
Christine's Photo Shoot {Day 1}
Last September I enlisted the help of a dear friend to model for a digital photography project at school. I've been a little slow on the uptake, but I'm starting to edit them more and more. I will share with you the exact methods I used to edit each photo, and even offer you the Photoshop file so you can see the layers and all that good stuff for yourself!
-----------
Shower Us In Light
by Katie Hunter {featuring model Christine Hooley}

Photoshop (.psd) file
The vignette, in my opinion, is a great action to have in Photoshop. A vignette or Holga effect can really tie an image together. It helps to give it a border without needing solid black lines around your photo. It's a very soft effect that is easily customizable.
Check back soon for more photography and scrapbook fun!
-----------
Shower Us In Light
by Katie Hunter {featuring model Christine Hooley}

How I made it:
This is the original, untouched photo I started with:

- Add a Brightness/Contrast Adjustment Layer using these settings:
- Brightness: +29
- Contrast: +9 - Using a basic brush (medium hardness/softness), color with black over the part of the image without the model. This will mask out the brightness and contrast adjustment so the model becomes a greater focal point.
- Add a Black & White Adjustment Layer using these settings:
- Red: 40%
- Yellows: 60%
- Greens: 40%
- Cyans: 60%
- Blues: 20%
- Magentas: 80% - Add a Curves Adjustment Layer like in the following screen shot:

- Add a Photo Filter Adjustment Layer. Choose "Yellow" from the Filter menu and set the density to 34%. Keep the "Preserve Luminosity" box checked.
- Add the vignette using these instructions:
- Create a new layer and place it above all the other layers
- Fill the layer with white
- On the top toolbar, go to Filter --> Distort --> Lens Correction
- In the dialogue box that pops up, you only need to adjust one thing. Set the Vignette amount to -100%
- Change the layer's blending mode to Multiply - Add a layer mask to the Vignette layer, and using a basic brush, paint black over the area where the model is not located. This will also help keep the subject bright and in focus.

Photoshop (.psd) file
---------
The vignette, in my opinion, is a great action to have in Photoshop. A vignette or Holga effect can really tie an image together. It helps to give it a border without needing solid black lines around your photo. It's a very soft effect that is easily customizable.
Check back soon for more photography and scrapbook fun!
Christine's Photo Shoot {Day 1}
Last September I enlisted the help of a dear friend to model for a digital photography project at school. I've been a little slow on the uptake, but I'm starting to edit them more and more. I will share with you the exact methods I used to edit each photo, and even offer you the Photoshop file so you can see the layers and all that good stuff for yourself!
-----------
Shower Us In Light
by Katie Hunter {featuring model Christine Hooley}
Photoshop (.psd) file
The vignette, in my opinion, is a great action to have in Photoshop. A vignette or Holga effect can really tie an image together. It helps to give it a border without needing solid black lines around your photo. It's a very soft effect that is easily customizable.
Check back soon for more photography and scrapbook fun!
-----------
Shower Us In Light
by Katie Hunter {featuring model Christine Hooley}
How I made it:
This is the original, untouched photo I started with:
- Add a Brightness/Contrast Adjustment Layer using these settings:
- Brightness: +29
- Contrast: +9 - Using a basic brush (medium hardness/softness), color with black over the part of the image without the model. This will mask out the brightness and contrast adjustment so the model becomes a greater focal point.
- Add a Black & White Adjustment Layer using these settings:
- Red: 40%
- Yellows: 60%
- Greens: 40%
- Cyans: 60%
- Blues: 20%
- Magentas: 80% - Add a Curves Adjustment Layer like in the following screen shot:
- Add a Photo Filter Adjustment Layer. Choose "Yellow" from the Filter menu and set the density to 34%. Keep the "Preserve Luminosity" box checked.
- Add the vignette using these instructions:
- Create a new layer and place it above all the other layers
- Fill the layer with white
- On the top toolbar, go to Filter --> Distort --> Lens Correction
- In the dialogue box that pops up, you only need to adjust one thing. Set the Vignette amount to -100%
- Change the layer's blending mode to Multiply - Add a layer mask to the Vignette layer, and using a basic brush, paint black over the area where the model is not located. This will also help keep the subject bright and in focus.
Photoshop (.psd) file
---------
The vignette, in my opinion, is a great action to have in Photoshop. A vignette or Holga effect can really tie an image together. It helps to give it a border without needing solid black lines around your photo. It's a very soft effect that is easily customizable.
Check back soon for more photography and scrapbook fun!
Subscribe to:
Comments (Atom)